Manualidades para Adultos Mayores: A Comprehensive Guide
Manualidades para adultos mayores offer a gateway to creativity, mental stimulation, and social interaction, serving as a therapeutic outlet while fostering connection and well-being. This guide provides practical advice on adapting activities to suit all abilities, ensuring a fulfilling experience for seniors.
Manualidades, or handcrafts, are a powerful tool for engaging seniors in creative and therapeutic activities. These activities foster cognitive stimulation, improve motor skills, and enhance emotional well-being. By adapting crafts to individual abilities, manualidades provide a sense of accomplishment and joy, helping seniors stay active and connected. They also serve as a means of social interaction, reducing feelings of isolation and promoting mental health. This introduction highlights the transformative potential of manualidades in enriching the lives of older adults.
Definition and Importance of Manualidades in Gerontology
Manualidades, or handcrafts, are creative activities that play a vital role in gerontology by promoting cognitive function, emotional well-being, and physical dexterity. These activities are designed to adapt to the abilities of older adults, fostering independence and self-esteem. They provide a sense of accomplishment and purpose, while also serving as a therapeutic outlet for mental and emotional health. Manualidades are essential in gerontology as they offer a holistic approach to aging, enhancing quality of life and encouraging social engagement among seniors;

Benefits of Manualidades for Seniors
Manualidades offer seniors cognitive stimulation, physical benefits, and emotional well-being, enhancing mental health and fostering social connections while promoting creativity and a sense of accomplishment.
Cognitive Stimulation and Memory Enhancement
Engaging in manualidades stimulates the brain, enhancing memory and cognitive function in seniors. Activities like painting, origami, or crafting require focus and problem-solving, challenging the mind and slowing cognitive decline. The repetitive motions and creative processes help improve concentration and recall, keeping the brain active and sharp. These tasks also foster a sense of accomplishment, boosting self-esteem and mental well-being.
Physical Benefits: Improving Motor Skills and Dexterity
Manualidades help seniors improve motor skills and dexterity through repetitive, precise movements. Activities like knitting, crocheting, or painting require coordination and grip strength, enhancing hand-eye coordination. These tasks strengthen muscles in the hands and fingers, reducing stiffness and improving flexibility. For those with arthritis or limited mobility, adaptive tools can make participation easier, promoting physical activity and reducing decline. Engaging in such crafts fosters independence and contributes to overall physical well-being, keeping seniors active and engaged.
Emotional and Mental Health: Stress Reduction and Mood Improvement
Engaging in manualidades provides emotional relief and mental well-being for seniors. These activities foster relaxation, reducing stress and anxiety through creative expression. The accomplishment of crafting something stimulates self-esteem and pride, boosting mood and emotional resilience. For those with conditions like depression or Alzheimer’s, manualidades serve as a therapeutic outlet, offering comfort and focus. The calm, meditative nature of these tasks helps manage emotional challenges, promoting a sense of fulfillment and joy in their golden years.
Social Benefits: Encouraging Connection and Community Building
Manualidades foster meaningful social connections among seniors, combating loneliness and isolation. Group activities encourage collaboration, shared ideas, and mutual support, strengthening community ties. Participants often feel a sense of belonging, which enhances their emotional well-being. The shared pride in creating something together further deepens relationships. These interactions not only build confidence but also create opportunities for storytelling and laughter, enriching their social lives and promoting a sense of purpose and camaraderie.

Popular Manualidades Activities for Seniors
Popular activities include painting, knitting, origami, clay modeling, and recycled crafts, offering creative expression and practical outcomes while adapting to individual skills and interests.
Painting: Techniques and Materials
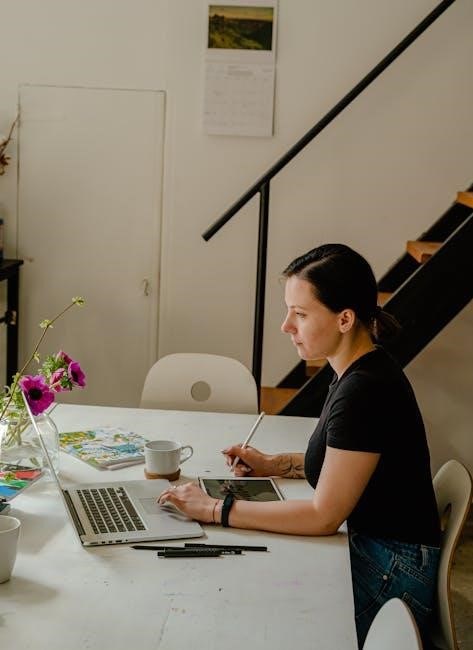
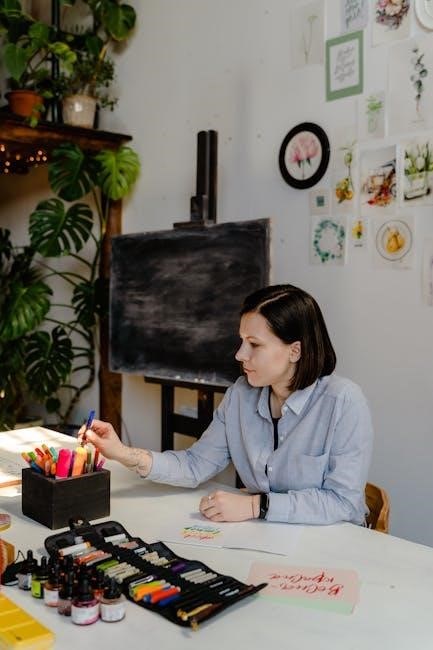
Painting is a therapeutic activity for seniors, promoting relaxation and creative expression. Watercolor, acrylic, and oil painting are popular techniques, each offering unique textures and results. Materials like soft-bristle brushes, vibrant paints, and canvas or paper are essential. Adaptive tools, such as larger brushes or ergonomic handles, can aid those with dexterity challenges. Guidance on color mixing and strokes can enhance the experience, fostering confidence and artistic growth. This activity not only stimulates the mind but also provides a sense of accomplishment and joy.
Knitting and Crochet: Creating Practical and Decorative Items
Knitting and crochet are calming, creative outlets for seniors, offering a meditative rhythm that reduces stress. These activities improve fine motor skills and hand-eye coordination while producing practical items like blankets, scarves, or decorative pieces. Using soft yarns, sturdy needles, and clear patterns makes them accessible. Seniors can create personalized gifts or home decorations, fostering a sense of purpose and accomplishment. These crafts also encourage social interaction when done in groups, making them a rewarding and engaging pastime for older adults.
Origami: Simple and Therapeutic Paper Folding
Origami, the art of paper folding, offers a calming and meditative experience for seniors. It enhances cognitive function, memory, and fine motor skills while reducing stress. Simple designs, such as folding animals or flowers, can be adapted to suit different skill levels. For those with physical or cognitive limitations, larger paper sizes or step-by-step guides can make the activity more accessible. Origami fosters patience, creativity, and a sense of accomplishment, making it an ideal therapeutic and social activity for older adults to enjoy individually or in groups.
Clay Modeling: Sculpting and Pottery
Clay modeling and pottery are therapeutic activities that offer seniors a creative outlet while enhancing dexterity and motor skills. Working with clay allows for the creation of functional or decorative items, fostering a sense of accomplishment. The tactile nature of clay stimulates the senses, while the process encourages focus and relaxation. Simple tools like rollers and molds make it accessible, even for those with physical limitations. This activity not only reduces stress but also provides cognitive stimulation and a way to express emotions. It’s a versatile and rewarding craft for seniors, promoting both creativity and well-being.
Recycled Material Crafts: Eco-Friendly Creativity
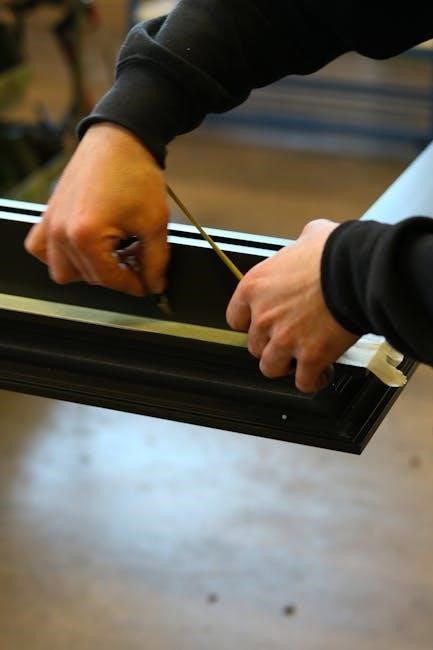
Recycled material crafts offer seniors an eco-friendly way to express creativity while repurposing everyday items. Transforming materials like old jars, fabric scraps, or cardboard into decorative or functional pieces fosters innovation and environmental awareness. This activity stimulates problem-solving skills and provides a sense of accomplishment. Simple, cost-effective, and adaptable to physical or cognitive limitations, recycled crafts encourage creativity and sustainability. Seniors can create unique items, such as planters, collages, or jewelry, promoting self-expression and pride in their eco-conscious contributions.

Adapting Manualidades for Seniors with Limitations
Adapting manualidades for seniors with limitations involves simplifying processes, using clear instructions, and incorporating assistive devices. This ensures activities are accessible, enjoyable, and tailored to their needs and abilities.
Physical Limitations: Simplifying Processes and Tools
For seniors with physical limitations, simplifying manualidades processes and tools is essential. Use larger, lightweight materials and ergonomic tools to ease handling. Break tasks into smaller, manageable steps to reduce fatigue. Adaptive grips or handles on tools can enhance dexterity. Ensure workspaces are comfortable, with adequate seating and lighting. Visual aids, like step-by-step images, can guide participants effectively. These adjustments ensure accessibility, allowing seniors to engage creatively without physical strain, fostering independence and enjoyment in their crafting experiences.
Cognitive Limitations: Clear Instructions and Support
For seniors with cognitive limitations, providing clear instructions and support is crucial. Use simple, concise language and avoid complex terminology. Visual aids, such as step-by-step images, can help clarify tasks. Offering one-on-one assistance ensures understanding and confidence. Breaking activities into manageable steps prevents overwhelm and allows for gradual learning. Patience and encouragement are key to fostering a positive experience. Adapt instructions to individual needs, ensuring each step is digestible and achievable. This approach helps seniors with cognitive challenges engage meaningfully in manualidades, promoting a sense of accomplishment and joy.
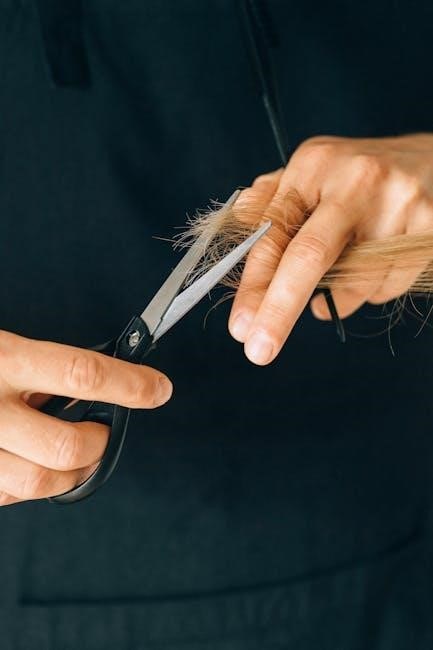
Using Assistive Devices for Improved Accessibility
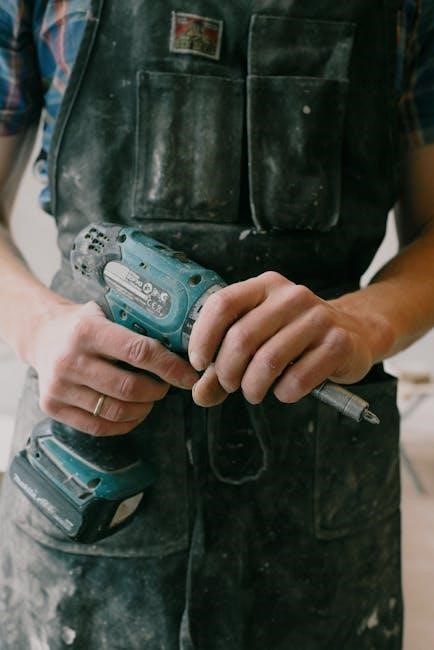
Assistive devices play a vital role in making manualidades accessible for seniors with physical or cognitive limitations. Tools like adaptive scissors with larger grips, ergonomic paintbrushes, or magnifying glasses can enhance dexterity and visibility. These devices allow seniors to participate independently, reducing frustration and boosting confidence. Lightweight materials, pre-cut templates, and easy-grip handles are also beneficial. By incorporating assistive devices, manualidades become more inclusive, ensuring all seniors can engage creatively and enjoy the therapeutic benefits of these activities. This support fosters a sense of accomplishment and joy, making the experience truly fulfilling.

Effective Guide Creation for Seniors
Creating guides for seniors requires clear instructions, simple language, and visual aids to ensure accessibility. This approach helps seniors engage effectively with manualidades, fostering creativity and confidence.
Step-by-Step Instructions for Easy Understanding
Step-by-step instructions are essential for seniors to follow manualidades effortlessly. Break tasks into small, manageable steps, ensuring clarity at each stage. Use simple language and avoid jargon. Include visual aids like images or diagrams to illustrate each step, making the process more intuitive. Highlight key actions and materials needed, ensuring instructions are easy to follow. This approach helps seniors understand and complete activities confidently, fostering a sense of accomplishment and enjoyment in their creative journey.
- Break tasks into clear, concise steps.
- Use visual aids to enhance understanding.
- Highlight key materials and actions.
- Ensure instructions are easy to follow.
Visual Aids: The Role of Images in Learning
Visual aids, such as images and diagrams, play a crucial role in helping seniors understand manualidades. Clear images break down complex steps, making tasks easier to follow. They provide a visual guide, reducing confusion and enhancing learning. For activities like origami or painting, detailed images of each step are invaluable. Photos of materials and tools also help seniors identify what is needed. Visual aids boost confidence and motivation, allowing seniors to see the process and final result. This approach makes learning more accessible and enjoyable for adults with varying cognitive or physical abilities.
- Images simplify complex instructions.
- Photos of materials and tools aid recognition.
- Visual guides enhance understanding and confidence.
Choosing the Right Materials and Tools
Selecting appropriate materials and tools is essential for seniors to enjoy manualidades. Opt for lightweight, easy-to-handle items that suit their physical abilities. Soft-bristled brushes, large beads, and ergonomic tools are ideal choices. Materials like foam, fabric, or recycled items are both durable and easy to work with. Avoid small or fragile components that may cause frustration. Tools with large grips or adaptive handles can enhance comfort and dexterity. Ensuring the right materials fosters creativity and makes the activity more enjoyable for adults with varying skill levels and physical limitations.
- Lightweight and easy-to-handle materials.
- Ergonomic tools for comfort and control.
- Durable materials to minimize frustration.

Safety and Accessibility in Manualidades
Ensure a safe environment with adaptive tools and clear workspaces. Prioritize physical comfort and minimize risks, while promoting independence and accessibility for seniors to fully enjoy manualidades activities.
Ensuring a Safe Environment for Crafting
Creating a safe crafting space for seniors is essential. Remove tripping hazards, ensure proper lighting, and use ergonomic seating. Adaptive tools, like large-handled scissors, can enhance accessibility. Provide necessary assistance and clear guidance to prevent accidents. Encourage a clutter-free workspace to minimize risks. Supervision and patience are key to ensuring seniors feel secure while engaging in manualidades. A well-organized environment fosters confidence and independence, allowing them to enjoy creative activities without stress.
Adapting Workspaces for Physical Comfort
Adapting workspaces for physical comfort is crucial for seniors. Use ergonomic chairs, height-adjustable tables, and non-slip mats to prevent fatigue and discomfort. Ensure good lighting to reduce eye strain and proper ventilation for a pleasant environment. Organize tools and materials within easy reach to minimize movement. Consider using larger grips on tools for those with dexterity issues. A comfortable workspace promotes relaxation and focus, allowing seniors to enjoy manualidades without physical strain. These adjustments create an inclusive setting that supports their creativity and well-being.

The Role of Caregivers and Therapists
Caregivers and therapists play a vital role in supporting seniors in manualidades, offering guidance, encouragement, and assistance. Their collaborative efforts enhance motor skills and provide a nurturing environment.
Supporting Seniors in Manualidades Activities
Supporting seniors in manualidades requires patience, adaptability, and encouragement. Caregivers and therapists should simplify processes, use clear instructions, and provide visual aids to ensure understanding. Selecting appropriate tools and materials that match their abilities fosters independence. Encouraging creativity while offering assistance when needed helps build confidence. A supportive environment, free from pressure, allows seniors to enjoy the therapeutic benefits of these activities, promoting relaxation and a sense of accomplishment.
Training for Caregivers: Best Practices
Training caregivers to support seniors in manualidades involves teaching adaptation techniques, clear communication, and patience. Caregivers should learn to simplify processes, use visual aids, and select appropriate materials. Understanding the senior’s abilities and limitations is crucial. Encouraging creativity while offering guidance fosters confidence. Caregivers should also learn to provide emotional support and create a relaxing environment. Continuous feedback and positive reinforcement help caregivers refine their approach, ensuring a meaningful and enjoyable experience for seniors. This training empowers caregivers to facilitate therapeutic and creative growth effectively.

Technology and Manualidades
Digital tools enhance creativity in manualidades, offering tutorials, virtual classes, and adaptive devices. Technology makes crafting accessible, fostering engagement and innovation for seniors while preserving traditional techniques.
Digital Tools for Enhancing Creativity
Digital tools empower seniors to explore manualidades through apps, online tutorials, and virtual classes. These resources provide step-by-step guides, interactive demos, and inspiration, making crafting more accessible. Many platforms offer adaptive features like zoom, voice commands, and touchscreens, catering to physical or cognitive limitations. Seniors can share their creations online, fostering a sense of community and pride. Digital tools not only enhance creativity but also keep manualidades relevant in a modern world, ensuring traditional crafts thrive across generations.
Success Stories and Case Studies
Seniors like Maria, who overcame arthritis through knitting, and Juan, who restored memory with origami, showcase the transformative impact of manualidades on well-being and joy in later life.
Impact of Manualidades on Senior Well-being
Manualidades have a profound impact on senior well-being, enhancing cognitive function, motor skills, and emotional health. Engaging in activities like painting or knitting stimulates memory and concentration, while reducing stress and anxiety. For those with conditions like Alzheimer’s or arthritis, these crafts provide therapeutic benefits, improving dexterity and offering a sense of accomplishment. They also foster social connections, combating loneliness and promoting a sense of community. By adapting to individual abilities, manualidades empower seniors to stay active, creative, and fulfilled, contributing to a higher quality of life in their golden years.
FAQs and Common Queries
- What are the benefits of manualidades for seniors?
- How can activities be adapted for physical or cognitive limitations?
- Which materials are best for beginners?
- Can these activities improve mental health?
Addressing Concerns and Providing Solutions
Common concerns about manualidades for seniors include physical limitations, cognitive challenges, and material safety. Solutions involve simplifying processes, using assistive tools, and ensuring a safe environment. For physical limitations, adaptive tools like larger grips or ergonomic handles can be used. Cognitive challenges can be met with clear, step-by-step instructions and visual aids. Safety is prioritized by selecting non-toxic materials and avoiding small, choking hazards. Caregivers play a vital role in providing support and encouragement, ensuring activities are both enjoyable and beneficial. These adaptations make manualidades accessible and rewarding for all seniors.
Resources and Further Reading
Explore websites like Pinterest and adultomayor.info for creative ideas and guides. Books on art therapy and senior activities also provide valuable insights and inspiration for manualidades projects.
Recommended Websites and Books
Discover inspiration and guidance through websites like Pinterest and adultomayor.info, which offer a wealth of creative ideas and step-by-step guides for senior manualidades. For deeper exploration, books such as “Art Therapy for Seniors” and “Creative Aging: A Guide for Seniors” provide valuable insights and therapeutic approaches. Additionally, “Handcrafts for Memory Care” focuses on activities tailored for cognitive stimulation. These resources are essential for caregivers, therapists, and seniors seeking engaging and fulfilling manualidades experiences.
Manualidades for seniors are a vital tool for creativity and well-being, fostering community connections. Future advancements in technology will enhance accessibility, making these activities even more inclusive for all.
The Growing Importance of Manualidades for Seniors
Manualidades for seniors are gaining recognition as a powerful tool for enhancing mental and physical well-being. These activities not only foster creativity but also serve as a form of therapy, reducing stress and improving motor skills. As the elderly population grows, the demand for accessible and engaging manualidades increases, making them a cornerstone of senior care. With advancements in technology and the development of adaptive tools, manualidades are becoming more inclusive, ensuring seniors can participate regardless of physical or cognitive limitations. This trend highlights their enduring value in promoting a fulfilling and active lifestyle for aging adults.