Mackay Marina Berth Fees: A Comprehensive Guide (Updated February 26‚ 2026)
This guide details Mackay Marina’s berth fees‚ encompassing daily‚ monthly‚ and long-term lease options for vessels ranging from 10 to 55 meters.
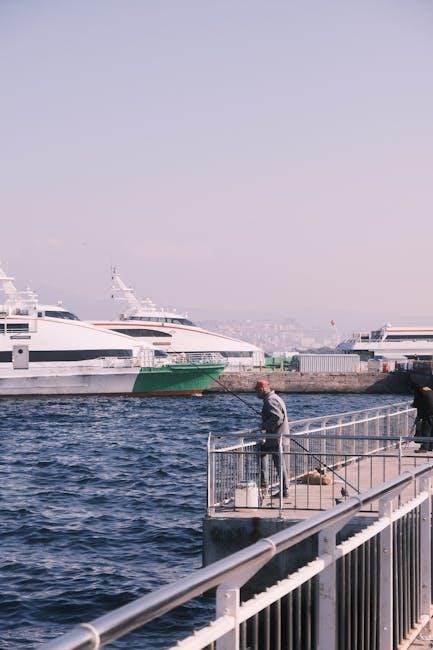
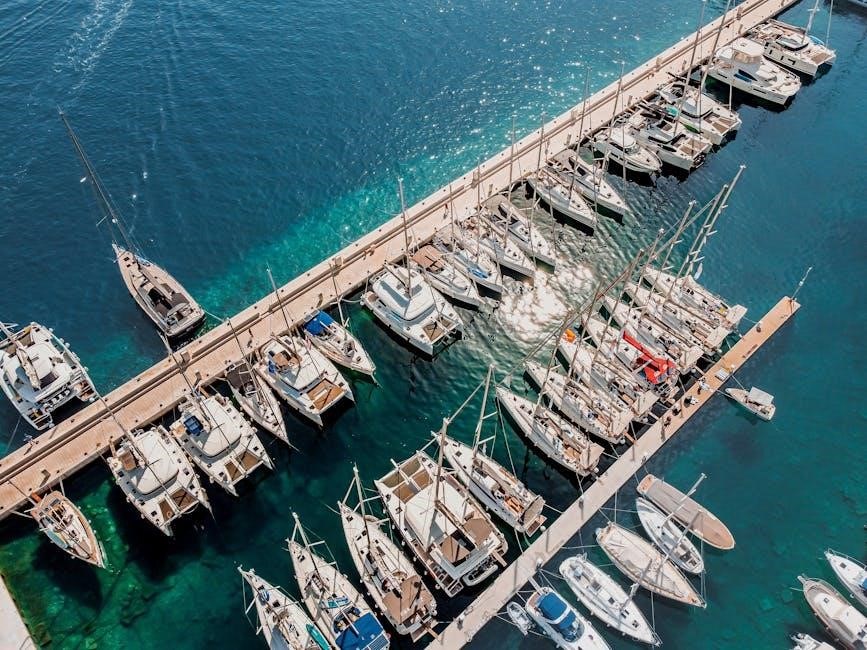
Mackay Marina stands as a premier boating destination on Australia’s Queensland coast‚ offering comprehensive facilities for vessels of all sizes. Boasting over 400 berths‚ it comfortably accommodates yachts and powerboats from 10 to an impressive 55 meters in length. The marina serves as a crucial gateway for exploring the beautiful Whitsunday Islands and embarking on South Pacific cruising adventures.
Beyond its berthing capacity‚ Mackay Marina provides a vibrant marine village atmosphere‚ complete with essential services and amenities for boat owners and visitors alike. Understanding the associated berth fees is vital for planning any extended stay or considering a long-term lease. This guide aims to provide a clear and updated overview of the 2026 rates and associated costs.
Mackay Marina Overview & Facilities
Mackay Marina is a fully serviced marina designed to cater to the diverse needs of the boating community. It features modern infrastructure‚ including secure access‚ well-maintained pontoons‚ and convenient parking facilities. Essential services such as electricity‚ water‚ and waste disposal are readily available to all berth holders. The marina also prioritizes safety‚ adhering to Maritime Safety Queensland regulations and providing comprehensive cyclone preparedness protocols.
Furthermore‚ Mackay Marina benefits from its strategic location‚ offering easy access to the open waters of the South Pacific. The adjacent marina village enhances the experience with various dining and retail options. Understanding these facilities is key when evaluating the value proposition alongside the berth fees.
Marina Location and Accessibility
Mackay Marina enjoys a prime waterfront location within Mackay‚ Australia‚ offering convenient access for both local boaters and visiting yachts from the South Pacific. Its coordinates facilitate easy navigation‚ supported by comprehensive charts and navigation aids. Road access is straightforward‚ with ample parking available for vehicles and trailers.
The marina’s proximity to Mackay Airport further enhances accessibility for crew and visitors arriving by air. Understanding the marina’s location is crucial when factoring in travel costs alongside berth fees. The marina’s strategic position supports regional cruising and long-distance voyages.
Vessel Capacity & Berth Sizes (10m ─ 55m)
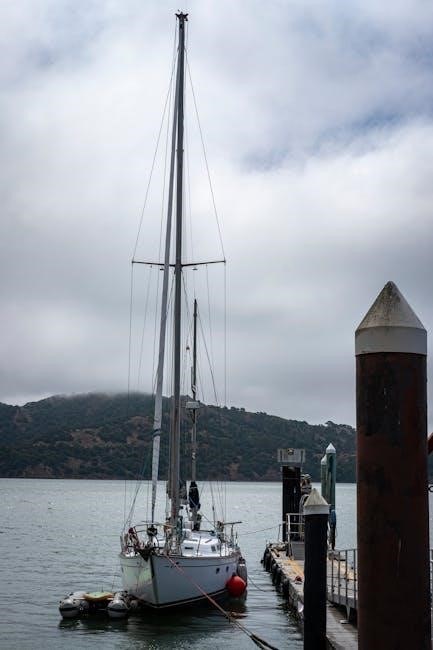
Mackay Marina boasts an impressive capacity exceeding 400 berths‚ accommodating a diverse range of vessels. Berth sizes are specifically designed to cater to boats from 10 meters up to a substantial 55 meters in length overall (LOA). This wide range ensures suitability for everything from smaller recreational craft to larger yachts and even modest superyachts.
Berth allocation considers both vessel length and beam (width) to guarantee a secure and comfortable fit. Understanding these dimensions is vital when calculating applicable berth fees‚ as costs are often tiered based on size. Proper fit ensures efficient marina operations.
Understanding Mackay Marina Berth Fees
Mackay Marina berth fees are structured to provide transparent and equitable pricing for all vessel owners. These fees cover the cost of maintaining the marina’s infrastructure‚ security‚ and access to essential services. Understanding the fee components is crucial for budgeting and planning your stay. Costs are directly related to vessel size‚ specifically the Length Overall (LOA) and beam.
Different options exist‚ including daily rates for short-term visitors‚ monthly fees for regular users‚ and long-term lease agreements offering potential cost savings. Additional charges may apply for services like electricity and water usage.
Factors Influencing Berth Fee Costs
Several key factors determine the cost of a berth at Mackay Marina‚ ensuring fair pricing based on vessel characteristics and usage. The primary determinant is Vessel Length Overall (LOA)‚ with longer vessels incurring higher fees due to the increased space occupied. Equally important is the Vessel Beam (Width)‚ impacting the berth size required and‚ consequently‚ the cost.
Additional considerations include the duration of stay – daily‚ monthly‚ or long-term leases – and any additional services utilized‚ such as electricity and water. These factors combine to create a comprehensive and transparent fee structure.
Vessel Length Overall (LOA)
Vessel Length Overall (LOA) is a critical factor in calculating Mackay Marina berth fees‚ directly correlating with the space a vessel occupies within the marina. Berths are priced per meter of LOA‚ meaning a longer vessel will naturally incur a higher charge. Mackay Marina accommodates vessels ranging from 10 meters to a maximum of 55 meters in length.
The marina’s fee structure is tiered‚ with rates increasing incrementally as the LOA increases. Accurate measurement of a vessel’s LOA is essential for determining the correct berth fee. This measurement must align with official vessel documentation.
Vessel Beam (Width)

Vessel beam‚ or width‚ plays a secondary‚ yet important‚ role in determining Mackay Marina berth fees‚ influencing the berth size required to safely accommodate a vessel. While LOA is the primary driver of cost‚ wider vessels may necessitate larger‚ more expensive berths. The marina assesses beam to ensure adequate space for maneuvering and to prevent congestion.
Berths are designed to comfortably fit vessels within specified beam ranges. Vessels exceeding these ranges may be subject to additional charges or assigned to larger‚ premium berths. Accurate beam measurement is crucial for correct fee calculation and berth allocation.
Current Berth Fee Structure (2026 Rates)
Mackay Marina’s 2026 berth fee structure is tiered‚ primarily based on Vessel Length Overall (LOA)‚ with adjustments for beam as previously detailed. Daily rates start at $3.50 per meter for vessels between 10m and 20m‚ increasing to $4.75 per meter for those 20m to 30m. Larger vessels‚ 30m to 40m‚ incur a daily fee of $6.00 per meter‚ and those exceeding 40m up to 55m are charged $7.25 per meter.
Monthly rates offer significant savings‚ calculated at approximately ten times the daily rate‚ with potential discounts for annual leases. These rates are subject to GST and additional charges for services.
Daily vs. Monthly Berth Fees
Choosing between daily and monthly berth fees at Mackay Marina depends on your vessel’s stay duration and anticipated usage. Daily fees‚ calculated per meter of LOA‚ provide flexibility for short-term visitors and transient vessels. However‚ monthly fees offer substantial cost savings for those planning extended stays within the marina.
Generally‚ a monthly berth represents approximately ten times the equivalent daily rate‚ making it economically advantageous for stays exceeding a few weeks. Consider potential cruising plans and marina usage when determining the most cost-effective option.
Long-Term Berth Lease Options

Mackay Marina provides attractive long-term berth lease options‚ catering to boat owners seeking secure and convenient vessel storage. These options extend beyond monthly arrangements‚ offering annual and multi-year agreements designed for consistent marina access. Annual leases provide stability with fixed rates for twelve months‚ simplifying budgeting and ensuring berth availability.
Multi-year leases‚ typically spanning three to five years‚ often include preferential rate adjustments and potential for berth upgrades. These options are ideal for owners committed to long-term berthing at Mackay Marina‚ offering both financial benefits and peace of mind.
Annual Berth Lease Details
An annual berth lease at Mackay Marina secures your vessel’s location for a full year‚ offering predictable costs and guaranteed access. Rates are determined by vessel length overall (LOA) and beam‚ with specific pricing tiers available in the official Mackay Marina fee schedule. Lease agreements commence on a calendar year basis‚ or pro-rata from commencement date.
Annual lease holders benefit from priority access to marina services and potential discounts on additional services like electricity and water. A deposit is required upon lease signing‚ refundable subject to the condition of the berth and adherence to marina regulations.
Multi-Year Lease Agreements
Mackay Marina offers multi-year lease agreements‚ providing long-term security and potential cost savings for vessel owners. These agreements‚ typically available for three to five-year terms‚ offer fixed annual rates‚ shielding leaseholders from potential fee increases during the lease period. Eligibility is subject to vessel condition and a satisfactory lease history.
Multi-year leases require a larger upfront deposit‚ reflecting the extended commitment. Early termination may incur penalties as outlined in the lease agreement. These options are ideal for owners frequently utilizing the South Pacific cruising routes.
Additional Marina Charges & Services
Beyond the base berth fees‚ Mackay Marina levies charges for supplementary services and utilities. Electricity and water usage are metered and billed monthly‚ with rates varying based on consumption. Proper disposal of waste materials is mandatory‚ incurring fees for black water pump-out and general rubbish removal.
Additional services‚ such as Wi-Fi access and laundry facilities within the Mackay Marina Village‚ are available at separate costs. Berth holders also have access to pump-out facilities‚ ensuring compliance with Maritime Safety Queensland regulations.
Electricity & Water Usage Fees
Mackay Marina implements a metered billing system for both electricity and potable water consumed by berth holders. Electricity is charged per kilowatt-hour (kWh)‚ with rates subject to periodic review and adjustment. Water usage is similarly measured‚ billed per kilolitre.
Current rates‚ as of February 26‚ 2026‚ are available upon request from the marina office and detailed within official documentation. Berth holders are encouraged to monitor their consumption to manage costs effectively. Failure to report faulty meters or unusual usage patterns may result in estimated billing.
Waste Disposal Fees
Mackay Marina provides comprehensive waste disposal facilities for berth holders‚ encompassing garbage‚ oil‚ and bilge water. Standard garbage disposal is included within the base berth fee‚ utilizing designated bins located throughout the marina precinct. However‚ disposal of larger items or hazardous waste may incur additional charges.
Dedicated pump-out services are available for black water and grey water‚ with fees calculated per litre pumped. Oil and oily waste must be disposed of through approved channels‚ attracting a per-litre fee. Details regarding acceptable waste types and associated costs are outlined in the marina’s waste management policy.
Mackay Port Procedures Relevant to Berth Holders
Berth holders at Mackay Marina must adhere to specific port procedures governed by Maritime Safety Queensland (MSQ). These regulations ensure safe navigation and operational efficiency within the harbor. All vessels are required to comply with MSQ’s reporting requirements for arrival and departure‚ utilizing designated VHF channels.
Understanding and adhering to trim requirements is crucial for vessel stability and marina infrastructure protection. Detailed charts and navigational aids are readily available to assist with safe passage. Berth holders should familiarize themselves with current shipping announcements and port infrastructure details‚ accessible through official MSQ channels and the marina office.
Maritime Safety Queensland Regulations
Compliance with Maritime Safety Queensland (MSQ) regulations is paramount for all vessels utilizing Mackay Marina. These regulations cover a broad spectrum‚ including vessel registration‚ safety equipment requirements‚ and operational procedures within port limits. MSQ enforces strict adherence to navigational rules‚ ensuring the safety of all mariners and the marine environment.
Berth holders are responsible for maintaining up-to-date knowledge of current MSQ directives‚ available through their official website and publications. Regular safety inspections may be conducted to verify compliance. Failure to adhere to MSQ regulations can result in penalties‚ including fines and restrictions on vessel operation within Queensland waters.
Trim Requirements for Vessels
Maintaining appropriate vessel trim is crucial for safe berthing and preventing damage to both the vessel and marina infrastructure. Mackay Marina specifies trim requirements to ensure stability and accessibility alongside the berths. Vessels must be trimmed to avoid excessive list or squat‚ which can impede access or create hazardous conditions.
Berth holders are responsible for adjusting ballast or cargo distribution to meet these requirements. Marina staff may conduct visual inspections and request adjustments if a vessel’s trim is deemed unsafe or unsuitable. Adherence to trim guidelines minimizes the risk of collisions with adjacent vessels or marina structures‚ safeguarding all parties involved;
Weather Considerations & Cyclone Procedures
Mackay experiences a tropical climate‚ demanding careful weather monitoring‚ particularly during the cyclone season (November to May). Berth holders must proactively track forecasts from the Bureau of Meteorology and heed any warnings issued by Mackay Marina management. Comprehensive cyclone procedures are in place to protect vessels and personnel.
These procedures include mandatory vessel securing‚ removal of loose gear‚ and potential relocation to designated cyclone moorings. Failure to comply with cyclone protocols may result in penalties and voided insurance coverage. Detailed guidelines are available from the marina office and are regularly updated to ensure optimal safety.
General Weather Information for Mackay
Mackay enjoys a warm‚ subtropical climate characterized by distinct wet and dry seasons. The wet season‚ from November to May‚ brings higher humidity and increased rainfall‚ often associated with tropical cyclones. Temperatures typically range from 23°C to 31°C year-round‚ with occasional heatwaves.
Southeasterly trade winds prevail during the drier months‚ providing pleasant sailing conditions. However‚ these winds can strengthen during the cyclone season‚ creating challenging conditions for vessels. It’s crucial for berth holders to regularly consult weather forecasts and be prepared for sudden changes in conditions. Accurate‚ up-to-date information is vital for safe navigation.
Cyclone Preparedness & Marina Protocols
Mackay Marina implements strict cyclone protocols to ensure vessel safety during severe weather events. Berth holders are responsible for securing their vessels according to marina guidelines‚ including appropriate mooring lines and fenders. The marina provides cyclone moorings‚ and their use is strongly advised during cyclone warnings.
A comprehensive cyclone plan is activated when a cyclone watch is issued‚ detailing procedures for vessel relocation and marina lockdown. Regular updates are provided to berth holders via email and noticeboards. Failure to comply with marina protocols may result in penalties. Prior preparation and adherence to instructions are paramount for minimizing cyclone damage.
Navigation Aids & Charts
Mackay Marina benefits from a well-maintained network of navigation aids‚ crucial for safe vessel maneuvering within the harbor. These include lighted buoys‚ beacons‚ and range markers‚ clearly indicating channel boundaries and potential hazards. Up-to-date nautical charts are essential for all vessels navigating the area‚ detailing water depths‚ seabed features‚ and navigational warnings.
Charts and navigational publications are available from various marine suppliers. Berth holders are responsible for possessing and utilizing current charts. The marina provides information regarding local Notices to Mariners‚ alerting mariners to temporary hazards or changes in navigational aids. Safe navigation relies on diligent chart updating and awareness.
Accessing Official Mackay Marina Information (PDF Documents)
For comprehensive details regarding Mackay Marina’s operations‚ including berth availability‚ detailed fee schedules‚ and specific regulations‚ several official PDF documents are readily accessible. These documents provide in-depth information beyond the scope of this guide‚ ensuring berth holders have access to the most current and accurate data.
Links to these downloadable PDFs are available on the Mackay Marina’s official website. Documents cover topics like marina rules‚ port procedures‚ and application forms for long-term leases. Regularly checking these resources is recommended‚ as policies and fees are subject to periodic updates.
Contact Information for Berth Enquiries
Should you require further clarification regarding Mackay Marina berth fees‚ availability‚ or any related inquiries‚ several convenient contact methods are available. Direct communication with the marina staff ensures you receive personalized assistance tailored to your specific needs and vessel requirements.
For general berth enquiries‚ please call +61 7 4952 4000 during marina working hours. Alternatively‚ email enquiries@mackaymarina.com.au for detailed responses. Detailed contact information‚ including postal address and specific department extensions‚ can be found within the official Mackay Marina PDF documents available online.
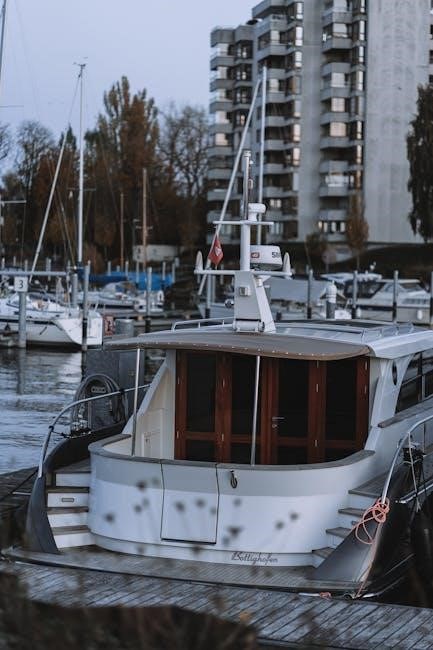
Mackay Marina Village Amenities
Beyond secure berthing‚ Mackay Marina Village offers a vibrant array of amenities enhancing the experience for berth holders and visitors alike. The village boasts a selection of waterfront restaurants and cafes‚ providing diverse dining options with stunning marina views. Conveniently located are well-maintained bathroom and shower facilities‚ ensuring comfort for extended stays.
Furthermore‚ the village features retail outlets catering to marine supplies and lifestyle needs. Berth holders benefit from easy access to provisioning services and laundry facilities. The lively atmosphere and comprehensive amenities contribute to a welcoming and convenient marine lifestyle.
South Pacific Cruising & Mackay Marina
Mackay Marina serves as an ideal gateway for yachts embarking on‚ or returning from‚ South Pacific cruising adventures. Strategically positioned on the Queensland coast‚ it provides a safe and well-equipped base for provisioning‚ maintenance‚ and crew preparation. The marina’s extensive berthage accommodates vessels of various sizes‚ up to 55 meters‚ facilitating long-term stays.
Its proximity to the Great Barrier Reef and numerous idyllic island destinations makes it a popular choice for sailors. Berth holders appreciate the marina’s comprehensive services and the supportive cruising community‚ enhancing their South Pacific experience.
Marina Working Hours & Time Zone
Mackay Marina operates with specific working hours to ensure efficient service delivery to all berth holders and visiting vessels. Generally‚ the marina office is open seven days a week‚ though hours may vary seasonally. Core operational hours typically fall between 8:00 AM and 5:00 PM‚ Monday to Friday‚ with reduced staffing on weekends and public holidays.
It’s crucial for visitors to note that Mackay observes Australian Eastern Standard Time (AEST)‚ which is UTC+10. During daylight saving periods‚ the time shifts to Australian Eastern Daylight Time (AEDT)‚ UTC+11. Confirm current hours before arrival.
Shipping Announcements & Port Infrastructure
Mackay Marina‚ as a vital port facility‚ regularly issues shipping announcements to berth holders and the broader maritime community. These announcements detail vessel movements‚ potential disruptions‚ and essential port updates‚ ensuring safe navigation and operational awareness. Access to these announcements is typically available through the marina’s official website and VHF radio broadcasts.

The port infrastructure at Mackay Marina is comprehensive‚ featuring well-maintained wharves‚ breakwaters‚ and navigational aids. It supports a diverse range of vessels‚ with over 400 berths available‚ catering to boats from 10 to 55 meters in length.
Berth Availability & Rental Process
Mackay Marina boasts over 400 berths accommodating vessels from 10 to 55 meters‚ but availability fluctuates seasonally. Prospective berth renters should directly contact the marina management for current availability and to initiate the rental process. This typically involves completing an application form‚ providing vessel details‚ and demonstrating appropriate insurance coverage.
Rental agreements outline the terms and conditions‚ including berth fees‚ usage policies‚ and responsibilities. A deposit may be required to secure the berth‚ with lease durations ranging from short-term to multi-year options.
Future Developments at Mackay Marina
Mackay Marina is committed to ongoing improvements to enhance the experience for berth holders and visitors alike. While specific details are subject to change‚ future development plans may include upgrades to marina infrastructure‚ such as berth modifications and electrical systems.
Potential expansions to the marina village amenities are also being considered‚ aiming to provide increased convenience and services. These developments are designed to maintain Mackay Marina’s position as a premier destination for boating and a gateway to the South Pacific.