Mini Tacos in Air Fryer: A Comprehensive Guide
Discover the ultimate guide to crafting delightful mini tacos using your air fryer! From crispy shells to flavorful fillings,
we’ll explore easy instructions and exciting variations for a quick, healthy, and satisfying meal.

What are Mini Tacos?
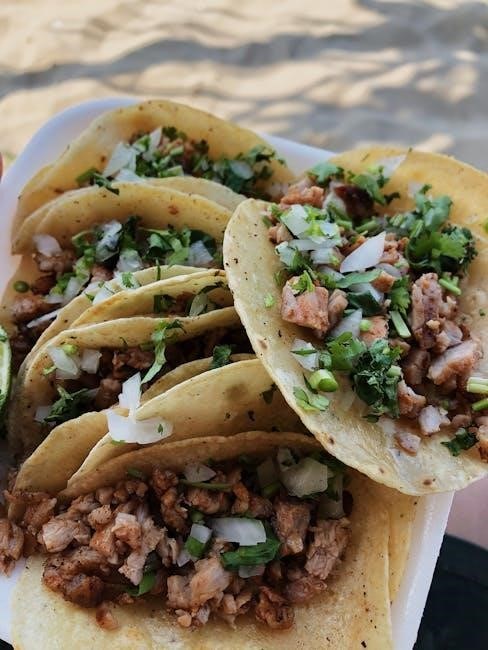
Mini tacos are a fun, bite-sized version of the classic Mexican street food. They typically feature small, crispy taco shells filled with a variety of savory ingredients, offering a delightful explosion of flavor in every bite. Unlike their larger counterparts, mini tacos are perfect for appetizers, parties, or a quick and satisfying snack.
These miniature delights allow for greater variety, enabling you to experiment with diverse fillings like seasoned ground beef, tender chicken, succulent shrimp, or even plant-based options like sweet potato and black beans. The compact size also makes them incredibly easy to handle and enjoy, especially for gatherings where guests can sample multiple flavors. They’re a playful twist on a beloved favorite!

Why Use an Air Fryer for Mini Tacos?
An air fryer is a game-changer when it comes to making mini tacos! It delivers that desirable crispy texture without the need for deep frying, resulting in a healthier and less greasy treat. The rapid air circulation ensures even cooking, guaranteeing perfectly heated fillings and delightfully crunchy shells.
Compared to traditional methods, air frying is significantly faster and requires minimal cleanup. You’ll enjoy all the flavor and satisfaction of fried tacos with a fraction of the effort. Plus, your kitchen stays cooler, avoiding the mess and lingering odors associated with oil. It’s a convenient and efficient way to enjoy this popular snack!
Popular Mini Taco Filling Options
The beauty of mini tacos lies in their versatility! You can stuff them with almost anything your heart desires. Ground beef is a classic choice, seasoned with traditional taco spices for a familiar flavor. For a lighter option, consider chicken – shredded or diced and marinated for extra zest.
Shrimp offers a delightful seafood twist, pairing beautifully with a vibrant cilantro slaw. Beyond these staples, explore creative fillings like sweet potato and black bean for a plant-based delight, or even a surprising bolognese sauce for a unique fusion. The possibilities are truly endless, allowing you to customize your mini tacos to your exact preferences!
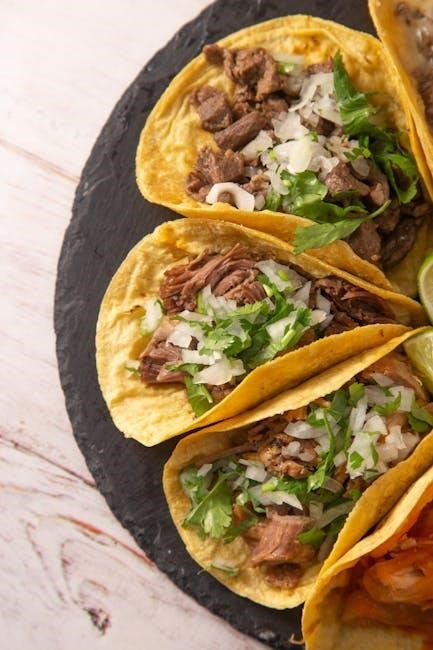
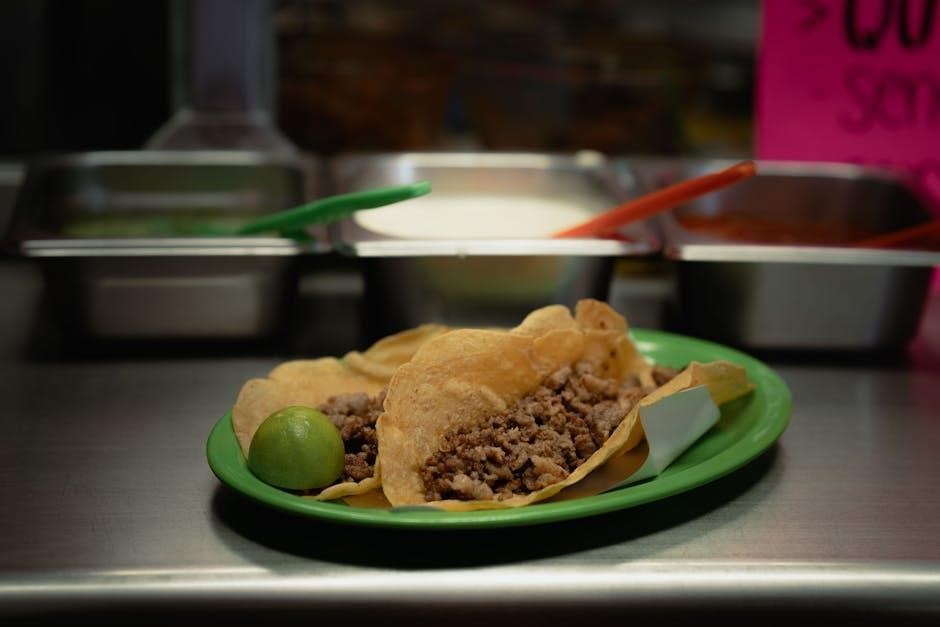
Ground Beef Mini Tacos
Ground beef mini tacos are a timeless favorite, offering a hearty and satisfying bite. Begin with high-quality ground beef, browned and drained of excess fat. Season generously with a classic taco seasoning blend – chili powder, cumin, paprika, garlic powder, and a pinch of cayenne for heat.
Ensure the beef is fully cooked and slightly crumbled for optimal texture within the mini taco shells. A little water added during cooking keeps it moist. This filling pairs wonderfully with classic toppings like shredded lettuce, diced tomatoes, and a dollop of sour cream. It’s a guaranteed crowd-pleaser, delivering a familiar and comforting taco experience in miniature form!
Chicken Mini Tacos
Chicken mini tacos offer a lighter, yet equally flavorful, alternative to beef. Utilize pre-cooked shredded chicken or quickly poach chicken breasts and shred them yourself. Marinate the chicken in a vibrant blend of lime juice, chili powder, and cumin for enhanced taste.
For an extra layer of flavor, consider using a queso seasoning blend, creating deliciously addictive queso chicken tacos. This filling is incredibly versatile, complementing both classic and unique taco toppings. The tender chicken, combined with the crispy shell, creates a delightful textural contrast. It’s a healthy and satisfying option for a quick and easy meal!
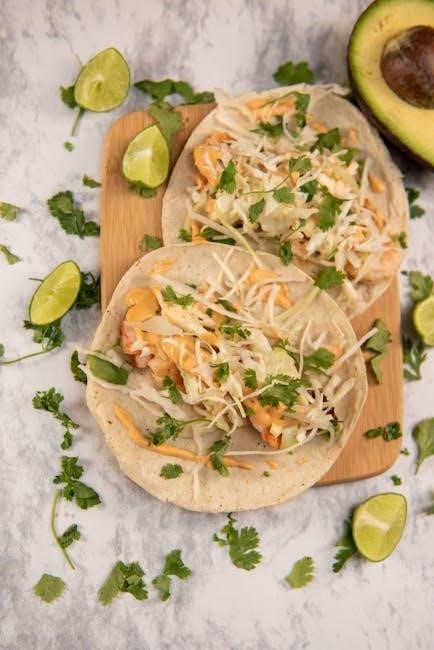
Shrimp Mini Tacos
Shrimp mini tacos are a fantastic option for a light and flavorful meal, rivaling even street tacos! Use pre-cooked shrimp to streamline the process, or quickly sauté peeled and deveined shrimp with garlic, chili powder, and a squeeze of lime juice.
Pair the shrimp with a vibrant cilantro slaw and pickled red onions for a burst of freshness and tangy flavor. These additions elevate the tacos to a whole new level. The air fryer ensures a perfectly crispy shell, providing a delightful contrast to the tender shrimp. It’s a healthy and satisfying choice, perfect for a quick weeknight dinner!
Preparing the Mini Taco Shells
Achieving perfectly crispy mini taco shells is crucial for an enjoyable experience! Begin by choosing the right shells – hard or soft, depending on your preference. Hard shells benefit greatly from the air fryer’s ability to restore crispness.
Pre-heating the air fryer is essential; aim for 350°F (175°C) for optimal results. Lightly spray the shells with cooking oil for enhanced crisping and even browning. Arrange the shells in a single layer within the air fryer basket, avoiding overcrowding. This ensures each shell gets adequately heated and maintains its structural integrity.
Choosing the Right Mini Taco Shells
Selecting the ideal mini taco shells significantly impacts the final outcome. You have options: pre-formed hard shells, soft tortillas for folding, or even making your own! For air frying, pre-made hard shells are popular for regaining lost crispness. However, soft tortillas can also be used, achieving a lightly toasted texture.
Consider the shell’s material – corn or flour. Corn shells offer a robust crunch, while flour shells are more pliable. Ensure the shells are appropriately sized for your filling. Smaller shells are perfect for bite-sized appetizers, while larger ones accommodate more substantial fillings. Quality matters; choose shells that are unbroken and appear fresh.
Pre-heating the Air Fryer
Proper pre-heating is crucial for achieving perfectly crispy mini tacos. Most air fryers require pre-heating to ensure even cooking and optimal texture. Typically, pre-heat your air fryer to 350°F (175°C) for approximately 3-5 minutes. This step prepares the air fryer basket, allowing the shells to crisp up efficiently.
Always consult your air fryer’s manual for specific pre-heating instructions, as times can vary between models. A well-heated air fryer promotes faster cooking and prevents the shells from becoming soggy. Skipping this step can result in unevenly cooked tacos. Ensure the heating element is fully activated before adding the mini taco shells.
Air Fryer Cooking Times & Temperatures
Achieving the ideal crispness requires precise temperature and timing. Generally, air fry mini taco shells at 350°F (175°C) for 3-5 minutes. Monitor closely, as cooking times can vary depending on your air fryer model and the shell’s thickness. For filled mini tacos, a slightly lower temperature of 320°F (160°C) for 5-7 minutes is recommended to ensure the filling heats through without burning the shell.
Regularly check for desired crispness, shaking the basket halfway through for even cooking. Avoid overcrowding the basket; work in batches if necessary. Overfilled baskets lead to steaming instead of frying, resulting in soft tacos. Adjust cooking time based on your preference for shell texture.
Step-by-Step Instructions: Basic Mini Taco Recipe
Let’s create delicious mini tacos! First, preheat your air fryer to 350°F (175°C). While it heats, brown 1/2 lb of ground beef, drain excess fat, and season with taco seasoning. Next, arrange mini taco shells in a single layer in the air fryer basket – avoid overcrowding. Air fry for 3-5 minutes, checking for desired crispness.
Carefully remove shells and fill with seasoned ground beef. Return filled tacos to the air fryer at 320°F (160°C) for another 2-3 minutes to warm the filling. Finally, top with your favorite toppings and serve immediately. Enjoy these quick and easy air-fried delights!
Recipe Variation: Queso Chicken Mini Tacos
Elevate your mini taco game with this queso chicken variation! Begin by cooking 1 lb of diced chicken breast, then shred it and mix with 1 cup of your favorite queso dip. Preheat your air fryer to 375°F (190°C). Arrange mini taco shells in the basket, ensuring they aren’t overlapping.
Fill each shell generously with the queso chicken mixture. Air fry for 3-4 minutes, or until the filling is heated through and the shells are golden and crispy. These dangerously delicious tacos are packed with flavor! Garnish with a sprinkle of cilantro and a dollop of sour cream for an extra touch.
Recipe Variation: Sweet Potato and Black Bean Mini Tacos
For a vibrant and plant-based option, try these sweet potato and black bean mini tacos! Dice one medium sweet potato and roast it until tender. In a bowl, combine the roasted sweet potato with one can of drained and rinsed black beans, a dash of chili powder, and cumin.
Preheat your air fryer to 350°F (175°C). Fill each mini taco shell with the sweet potato and black bean mixture. Air fry for 3-5 minutes, until the shells are warmed and slightly crispy. Jamie Oliver’s inspired recipe delivers fresh, spicy flavors! Top with avocado slices and a squeeze of lime juice for a delightful, healthy treat.
Toppings and Serving Suggestions
Elevate your air fryer mini tacos with a delightful array of toppings! Classic Taco Toppings include shredded lettuce, diced tomatoes, chopped onions, and a dollop of sour cream. Don’t forget a sprinkle of shredded cheese – cheddar, Monterey Jack, or a Mexican blend work wonderfully.
Unique Taco Toppings can add a special touch. Consider a vibrant cilantro slaw, pickled red onions for a tangy kick, or a drizzle of spicy sriracha mayo. Serve your mini tacos with a side of guacamole and salsa for a complete and satisfying meal. These are perfect for sharing or enjoying as a flavorful snack!
Classic Taco Toppings
For a traditional taco experience, embrace the timeless classics! Start with a generous layer of crisp, shredded lettuce, providing a refreshing crunch. Dice ripe tomatoes for a burst of juicy sweetness, and finely chop white or red onions for a subtle bite. A dollop of cool, creamy sour cream adds richness and balances the flavors.
Don’t underestimate the power of cheese! Shredded cheddar, Monterey Jack, or a vibrant Mexican blend melt beautifully and complement the filling. A sprinkle of fresh cilantro brightens the overall taste. These simple, yet essential toppings transform your air fryer mini tacos into a familiar and comforting delight.
Unique Taco Toppings
Elevate your mini taco game with unexpected and exciting toppings! Consider a vibrant mango salsa for a sweet and spicy kick, or a zesty pineapple relish to brighten the flavors. Pickled red onions offer a tangy crunch, while a drizzle of spicy mayo adds creamy heat.
For a gourmet touch, explore crumbled cotija cheese, a flavorful Mexican cheese, or a sprinkle of toasted pepitas (pumpkin seeds) for added texture. A smear of avocado crema provides richness and coolness. Don’t be afraid to experiment – these unique additions will transform your air fryer mini tacos into a culinary adventure!
Tips for Perfectly Crispy Mini Tacos
Achieving ultimate crispiness is key! Avoid overcrowding the air fryer basket; work in batches for even cooking. A light spray of oil onto the shells before air frying enhances browning and texture. Pre-heating the air fryer is crucial for optimal results – ensure it’s hot before adding the tacos.
For extra crunch, flip the mini tacos halfway through the cooking process. Monitor closely during the final minutes to prevent burning. If using pre-made shells, check for any moisture; a slightly dry shell crisps up better. Remember, air frying delivers a healthier, satisfying crunch without excessive oil!
Troubleshooting Common Issues
Shells not crispy enough? Increase cooking time by 1-2 minutes, or slightly raise the air fryer temperature. Ensure the shells aren’t overcrowded, allowing for proper air circulation. A light oil spray can also help achieve desired crispness. Filling too hot? Allow the filling to cool slightly before assembling the tacos, preventing shell breakage and ensuring a more comfortable eating experience.
If tacos are burning, reduce the temperature and cooking time. Monitor closely during the final minutes. Remember, air fryers vary, so adjustments may be needed. Experiment to find the sweet spot for your specific model!
Shells Not Crispy Enough
Achieving perfectly crispy mini taco shells in your air fryer requires a few key adjustments. First, ensure you aren’t overcrowding the basket; shells need space for air circulation. Try increasing the cooking time by one to two minutes, carefully monitoring to prevent burning. A light spray of oil – avocado or olive oil work well – can significantly enhance crispness.
Consider pre-heating the air fryer thoroughly before adding the shells. If issues persist, slightly increase the temperature, but be cautious. Experiment with small batches to dial in the ideal settings for your specific air fryer model and shell type.
Filling Too Hot
A common challenge when air frying mini tacos is managing the filling temperature. Excessively hot fillings can cause shells to become soggy or even crack during assembly and cooking. Always allow cooked fillings – like ground beef, chicken, or shrimp – to cool slightly before spooning them into the shells.

Consider preparing the filling in advance and refrigerating it briefly. This helps maintain structural integrity. Avoid overfilling the shells, as this exacerbates the heat issue. If using cheese, add it towards the end of the air frying cycle to prevent excessive melting and leakage.
Cleaning and Maintenance of Your Air Fryer
Regular cleaning is crucial for optimal air fryer performance and longevity. After making mini tacos, allow the basket and pan to cool completely before removing and washing. Most air fryer components are dishwasher safe, but check your manufacturer’s instructions. For stubborn food residue, soak the basket in warm, soapy water.
Avoid abrasive cleaners that could damage the non-stick coating. Wipe down the exterior of the air fryer with a damp cloth. Periodically check and clean the heating element, if accessible, to remove any grease buildup. Proper maintenance ensures consistently crispy mini tacos and extends the life of your appliance.
Safety Precautions When Air Frying
Always prioritize safety when using your air fryer to create delicious mini tacos. Never leave the air fryer unattended during operation. Ensure the appliance is placed on a stable, heat-resistant surface, away from flammable materials. Avoid overfilling the basket, as this can cause uneven cooking and potential hazards.
Be cautious when removing the basket, as it will be hot. Use oven mitts or tongs to prevent burns. Never immerse the air fryer housing in water. Regularly inspect the power cord for damage and discontinue use if any issues are detected. Following these precautions guarantees a safe and enjoyable mini taco experience.