Brow Shape Guide: A Comprehensive Overview (Updated 04/07/2026)
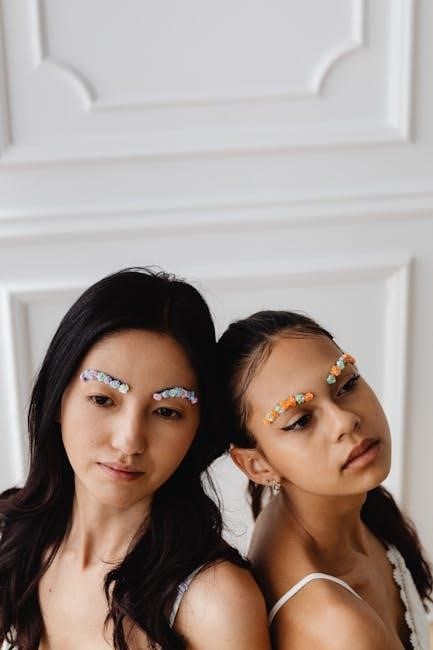
This guide explores the transformative power of brows, evolving trends, and techniques for achieving the perfect shape. Brows frame the face, impacting overall appearance and balance.
The Importance of Brow Shape
The pursuit of perfectly shaped eyebrows has dramatically shifted from a minor beauty consideration to a crucial facial feature capable of significantly altering one’s appearance. Makeup artists consistently highlight the profound impact eyebrows have on overall aesthetics. Brows aren’t merely about filling in sparse areas; they fundamentally define and frame the face, influencing perceptions of beauty and youthfulness.
Eyebrow shape subtly, yet powerfully, balances facial features and provides essential structure. Even a slight adjustment to the arch can create a noticeable difference in how features harmonize. Well-groomed brows can lift the eyes, making them appear more open and awake, and can even subtly contour the face, enhancing bone structure.
In today’s beauty landscape, brows remain a cornerstone of both makeup routines and general grooming practices. Despite the rising popularity of minimalist aesthetics like the “Clean Girl” look, the importance of defined, yet natural-looking, brows persists. They are a non-negotiable element for some, while others appreciate their ability to subtly enhance natural features. Ultimately, eyebrows are a powerful tool for self-expression and confidence.
Evolution of Brow Trends
The history of eyebrow fashion is a fascinating journey of shifting ideals. From the thin, dramatically arched brows popularized in the 1920s – often achieved with pencil and careful plucking – to the fuller, more natural shapes of recent years, brow trends have consistently reflected broader cultural aesthetics. The mid-20th century saw a return to bolder brows, mirroring the glamour of Hollywood stars.
Throughout the decades, trends oscillated between extremes. The 1980s favored bushy, untamed brows, while the 1990s and early 2000s witnessed a resurgence of the ultra-thin, over-plucked look. More recently, there’s been a significant shift towards embracing natural texture and fullness, with a focus on enhancing, rather than drastically altering, one’s existing brow shape.
Today, the emphasis is on achieving a polished, yet effortless, brow. Techniques like microblading and permanent makeup offer solutions for those seeking long-lasting definition, while brow serums and growth treatments cater to individuals desiring fuller, healthier brows. This evolution demonstrates the enduring power of eyebrows as a key element of self-expression and beauty.
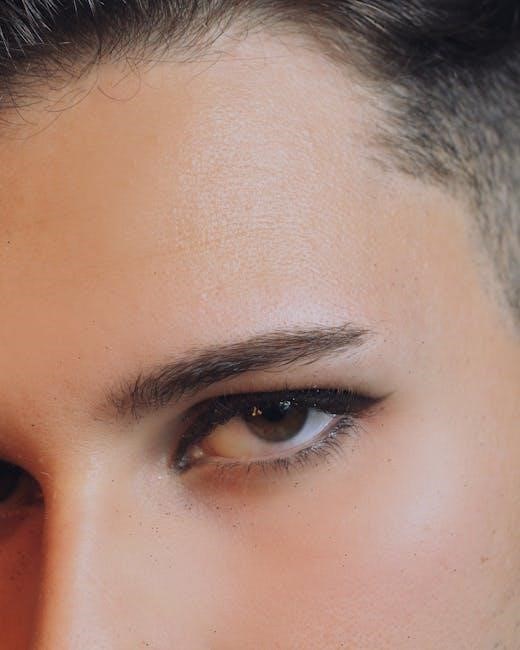
Brows as a Framing Feature
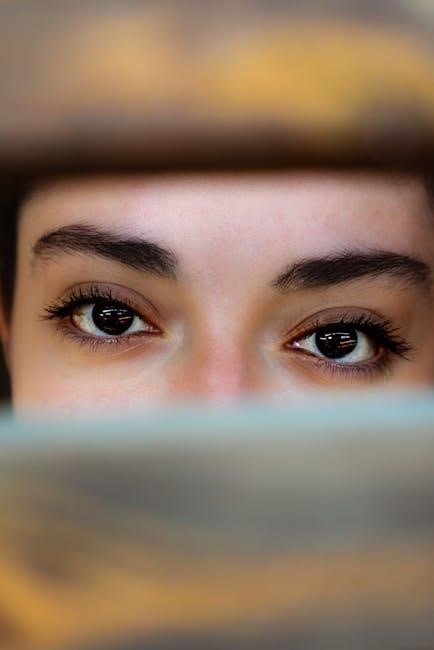
Eyebrows possess a unique ability to dramatically frame the face, acting as a natural border that draws attention to the eyes and enhances overall facial harmony. They aren’t merely about hair growth; they’re architectural elements that influence how we perceive facial structure and symmetry. Well-defined brows can lift the appearance of the eyes, making them appear more open and youthful.
Consider the impact of a perfectly sculpted brow arch – it can subtly lift the brow bone, creating a more alert and refreshed look. Conversely, poorly shaped brows can drag down the eyes, contributing to a tired or aged appearance. The shape, thickness, and angle of the brows work in concert to define the upper portion of the face, influencing how light and shadow play across the features.
Makeup artists consistently emphasize the importance of brows as the foundation for any makeup look. They are the first step in defining the face and creating a balanced canvas. Properly groomed brows can even minimize the need for extensive eye makeup, offering a naturally polished aesthetic. They truly are the unsung heroes of facial framing.
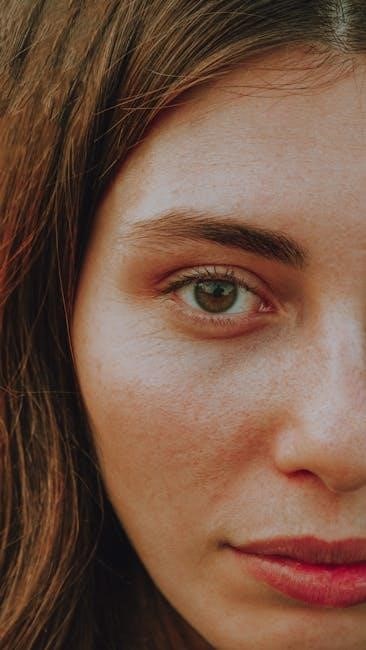
The Impact of Brow Shape on Facial Structure
The shape of your eyebrows wields surprising power over perceived facial structure, subtly altering how features are balanced and defined. Even slight adjustments to the arch, thickness, or length can create the illusion of a different face shape. A higher arch, for instance, can lift the face, making it appear slimmer and more elongated, while a softer, flatter brow can broaden the appearance.
Brows can visually correct imbalances. For example, a strategically shaped brow can minimize the appearance of a prominent forehead or balance a strong jawline. They can also create symmetry, drawing attention away from minor imperfections. The angle of the brow influences the direction the eye naturally follows, impacting how other facial features are perceived.
Understanding this impact is crucial for achieving a harmonious and flattering look. It’s not about following trends blindly, but about tailoring the brow shape to complement your unique facial anatomy. A well-considered brow shape enhances natural beauty and creates a more polished, balanced appearance, fundamentally altering facial perception.
Understanding Your Face Shape
Identifying your face shape – round, square, oval, or heart-shaped – is paramount. This knowledge unlocks personalized brow recommendations, ensuring a harmonious and balanced aesthetic outcome.
Round Face Shapes & Brow Recommendations
For round faces, the goal is to create the illusion of length and definition. Avoid overly rounded brow shapes, as they can accentuate the face’s softness and lack of angles. Instead, opt for brows with a defined arch. A higher arch lifts the face, providing a sculpted appearance and drawing the eye upwards, creating a more elongated effect.
Consider a slightly angled brow – not too severe, but enough to introduce some structure. This helps to visually slim the face. Fuller brows can also work well, adding dimension and balance. However, ensure they are well-groomed and not overly bushy, as this can overwhelm the features.
Pay attention to the brow tail; extending it slightly beyond the outer corner of the eye can further enhance the lengthening effect. Avoid short, blunt brows, as they can make the face appear wider. Subtle shaping and careful attention to detail are key to achieving a flattering brow shape for a round face, enhancing natural beauty and facial harmony.
Square Face Shapes & Brow Recommendations
Individuals with square face shapes benefit from brow styles that soften angular features. Harsh, straight brows will only emphasize the jawline’s strong definition, creating a boxy appearance. The ideal approach is to embrace softer, more rounded brow shapes. A gentle arch is crucial, as it introduces curves that counterbalance the face’s inherent angles.
Avoid excessively high arches, which can appear unnatural and accentuate the squareness. Instead, focus on a medium-height arch that follows the natural curve of the cheekbone. Fuller brows are generally flattering, adding softness and balance to the overall look.
Slightly extending the brow tail can also help to visually lengthen the face. Careful grooming is essential to ensure the brows aren’t overly severe or angular. The goal is to create a harmonious balance between the brows and the face’s structure, softening the overall impression and enhancing natural beauty.
Oval Face Shapes & Brow Recommendations
Considered the most versatile face shape, oval faces can pull off a wide range of brow styles. However, the key is to maintain balance and enhance the natural harmony of the features. Generally, a softly arched brow is universally flattering for oval faces, adding definition without being overly dramatic.
Avoid extremely harsh or angular brows, as they can disrupt the face’s natural softness. Similarly, overly rounded brows might lack the definition needed to complement the oval shape. A medium arch height is ideal, following the natural curve of the cheekbone to lift and frame the eyes.
Experimentation is encouraged, but maintaining a proportionate brow thickness is crucial. Thicker brows can add youthful fullness, while thinner brows offer a more refined look. The brow tail length should be balanced with the face’s length, avoiding excessive extension or shortening. Ultimately, the goal is to enhance, not overpower, the oval face’s inherent symmetry.
Heart-Shaped Face Shapes & Brow Recommendations
Heart-shaped faces, characterized by a wider forehead and narrower chin, benefit from brows that balance the upper portion of the face. The aim is to soften the forehead’s width and add a touch of fullness to the lower face. A low arch or a straight brow shape is generally recommended, as it visually widens the chin area and creates a more proportionate look.
Avoid high arches, which can accentuate the forehead and make the chin appear even smaller. A softer, rounded brow shape is also preferable to harsh angles, contributing to a more harmonious appearance. Brow thickness is important; medium to slightly thicker brows can help balance the face without overwhelming the features.
Focus on keeping the brow tail relatively neutral or slightly descending, avoiding a sharp upward lift. This helps to visually soften the pointed chin. Subtle definition is key – avoid overly dramatic shaping that could disrupt the face’s natural balance. The goal is to create a softer, more balanced silhouette.

Essential Brow Shaping Techniques
Various methods exist for achieving desired brow shapes, including threading for precision, waxing for speed, tweezing for detail, and microblading for a semi-permanent solution.
Threading: Precision and Longevity
Threading stands out as an ancient hair removal technique, originating in Middle Eastern and Asian cultures, and gaining immense popularity for eyebrow shaping due to its exceptional precision. Unlike waxing, which removes hair in a larger area, threading utilizes a thin cotton or polyester thread that is twisted and rolled over the skin, effectively lifting hair from the follicle. This method allows brow artists to sculpt incredibly defined shapes, removing even the finest, shortest hairs that waxing or tweezing might miss.
The benefits of threading extend beyond precision. Because it doesn’t involve chemicals or pulling at the skin, it’s often considered gentler, making it suitable for sensitive skin types. Furthermore, threading typically results in longer-lasting results compared to waxing or tweezing – hair can take between four to six weeks to grow back. This longevity stems from the technique’s ability to remove hair directly from the root. While it may require a skilled technician and can be slightly more time-consuming than other methods, the refined results and minimal skin irritation make threading a favored choice for those seeking perfectly sculpted brows.
Waxing: Speed and Effectiveness
Waxing remains a widely popular and efficient method for eyebrow shaping, prized for its speed and ability to remove a larger volume of hair at once. The process involves applying warm or cold wax to the eyebrow area, which adheres to the hairs. A strip of cloth is then pressed onto the wax and swiftly removed, pulling the hair out from the root. This results in relatively smooth skin and typically lasts for several weeks, generally between three to six, depending on individual hair growth cycles.
While incredibly effective, waxing isn’t without considerations. It can be more irritating to sensitive skin than threading or tweezing, potentially causing redness or minor discomfort. It’s crucial to ensure the wax isn’t too hot to avoid burns and that a skilled technician performs the procedure to minimize skin trauma. Regular waxing can also, over time, potentially lead to ingrown hairs. However, for those seeking a quick and relatively affordable brow shaping solution, waxing offers a compelling option, particularly for maintaining a defined shape between more precise treatments like threading.
Tweezing: Control and Detail
Tweezing offers the ultimate in precision and control when it comes to eyebrow shaping. This method involves using a pair of tweezers to individually pluck hairs from the root. While more time-consuming than waxing or threading, tweezing allows for meticulous shaping and the removal of stray hairs with exceptional accuracy. It’s an ideal technique for refining a brow shape already established by another method, or for those who prefer a very natural and subtle approach to grooming.
Tweezing is generally considered the least irritating method of hair removal, making it suitable for even the most sensitive skin. However, it’s essential to use high-quality, slanted tweezers for optimal grip and to pluck hairs in the direction of growth to minimize breakage and ingrown hairs. Consistent tweezing can also gradually reduce hair density over time. For those who enjoy a hands-on approach and prioritize detail, tweezing provides a cost-effective and highly customizable solution for maintaining perfectly sculpted eyebrows.
Microblading & Permanent Makeup Options
For those seeking a long-term solution to sparse or uneven brows, microblading and other permanent makeup options offer a compelling alternative. Microblading involves using a handheld tool with tiny needles to deposit pigment into the superficial layers of the skin, creating the illusion of fuller, more defined brows. This differs from traditional tattooing, as the pigment is not implanted as deeply, resulting in a more natural look.
Other permanent makeup techniques, such as powder brows and ombre brows, utilize different application methods and pigment densities to achieve varying effects. These options can range from subtle enhancements to bold, dramatic transformations. It’s crucial to choose a highly skilled and certified technician to ensure safety and optimal results. While these procedures offer convenience and long-lasting results, they require careful consideration, as they are semi-permanent and may require touch-ups over time to maintain color and shape. Imagine waking up with perfect brows daily!
Maintaining Your Brow Shape
Consistent grooming, regular professional appointments, and addressing sparse areas are key to brow maintenance. Daily routines and specialized treatments ensure lasting shape and fullness.
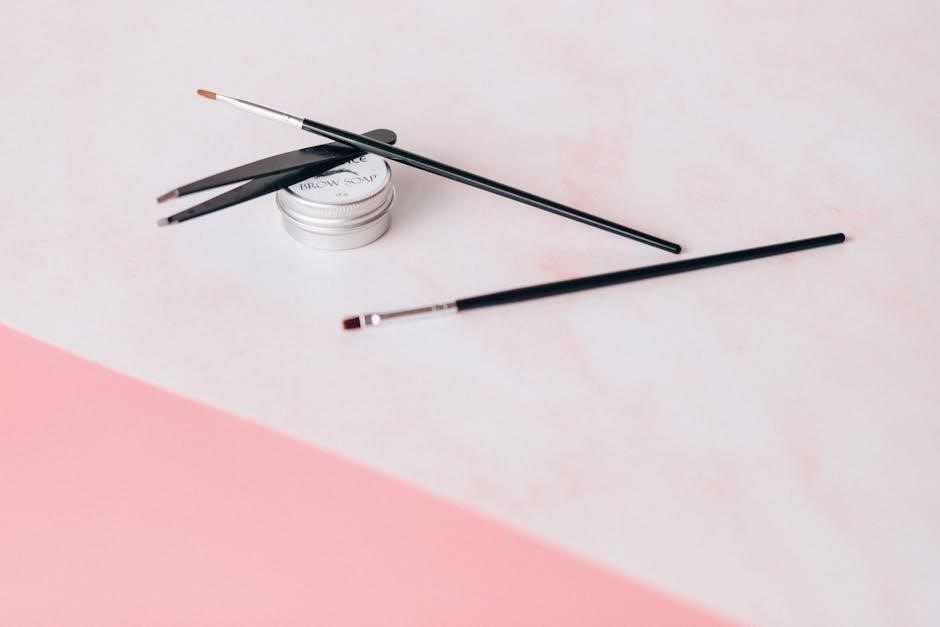
Daily Brow Grooming Routine
Establishing a consistent daily brow grooming routine is paramount for maintaining your desired shape and ensuring a polished look. Begin each morning by gently brushing your brow hairs upwards and outwards using a spoolie – a clean mascara wand. This helps to distribute natural oils, detangle hairs, and reveal their true shape.
Next, consider using a brow gel to set the hairs in place. Clear gel provides a natural hold, while tinted gel can subtly fill in sparse areas and add definition. For those preferring a more defined look, a brow pencil or powder can be used to fill in gaps and enhance the brow’s arch. Apply with light, feathery strokes, mimicking the direction of natural hair growth.
Avoid over-plucking or over-shaping daily, as this can hinder hair growth and disrupt the brow’s natural form; Focus instead on tidying up stray hairs and maintaining the overall shape achieved through professional shaping techniques. A quick once-over with tweezers to remove any rogue hairs is sufficient. Remember, a little daily effort goes a long way in preserving your perfect brow shape and boosting your confidence!
Professional Brow Appointments: Frequency
Determining the ideal frequency of professional brow appointments depends largely on the shaping method used and your individual hair growth rate. For those who prefer threading or waxing, a visit every 4-6 weeks is generally recommended. This timeframe allows sufficient hair regrowth for effective shaping while preventing brows from becoming overgrown and unruly.
If you opt for tweezing as your primary shaping method, you may be able to extend the interval between appointments to 6-8 weeks. However, regular maintenance is still crucial to prevent ingrown hairs and maintain a clean, defined shape. Individuals with faster hair growth may require more frequent visits, potentially every 3-4 weeks.
Those considering microblading or permanent makeup will have significantly less need for frequent appointments, with touch-ups typically required only once or twice a year to maintain color and definition. Ultimately, consulting with a skilled brow technician will help you establish a personalized appointment schedule tailored to your specific needs and desired results. Consistent professional care ensures optimal brow health and a consistently polished appearance.
Men’s Brow Maintenance
While often overlooked, men’s eyebrow maintenance is increasingly common, moving beyond simply untamed growth. Unlike traditionally sculpted female brows, the goal for men is usually a natural, groomed appearance – controlling fullness and stray hairs rather than dramatically reshaping. Men’s eyebrows tend to be fuller and fuzzier, requiring regular attention to prevent an unkempt look.
Simple techniques like tweezing stray hairs between the brows and along the upper brow line can make a significant difference. Avoid over-plucking, as this can create unnatural gaps. Trimming excessively long hairs with small scissors or a brow comb is also beneficial. For those seeking a more defined shape, professional threading or waxing can be considered, but emphasize a natural result to the technician.
Regular maintenance, even just a quick tidy-up every couple of weeks, contributes to a polished and put-together appearance. Ignoring brow maintenance can inadvertently create a harsher or more severe facial expression. Prioritizing grooming demonstrates attention to detail and overall self-care.
Addressing Sparse Brows: Growth Serums & Treatments
For individuals experiencing sparse or thinning eyebrows, a range of solutions exists beyond traditional makeup. Brow growth serums have gained popularity, often containing peptides, vitamins, and botanical extracts designed to stimulate hair follicles and encourage growth. Consistency is key with these serums; results typically require several weeks or months of daily application.
Beyond serums, professional treatments like microblading and permanent makeup offer more long-lasting solutions. Microblading involves creating fine, hair-like strokes with a specialized tool to mimic natural brow hairs, while permanent makeup utilizes tattooing techniques for a fuller appearance. These options require careful consideration and a skilled technician to achieve a natural-looking result.
It’s crucial to identify the underlying cause of sparse brows – factors like over-plucking, medical conditions, or nutritional deficiencies can contribute. Consulting a dermatologist can help determine the best course of action. Prioritizing a healthy diet rich in vitamins and minerals also supports overall hair health, potentially aiding brow growth.